
The Honeywell T6 Pro Installation Manual PDF is a comprehensive guide for installing and configuring the Honeywell T6 Pro thermostat. It provides detailed step-by-step instructions, wiring diagrams, and essential safety precautions to ensure a smooth setup process. The manual covers various installation scenarios, including compatibility checks, power requirements, and mounting options. Before starting, review the manual to understand system requirements and ensure proper installation for optimal performance.
1.1 Overview of the Honeywell T6 Pro Thermostat
The Honeywell T6 Pro is a programmable thermostat designed for smart home integration. It learns system heating/cooling patterns to optimize comfort. Compatible with various HVAC systems, it requires a 24 VAC power supply and a C-wire. Featuring a user-friendly touchscreen, geofencing, and adaptive recovery, it enhances energy efficiency and convenience; Part of the Honeywell Home series, it’s manufactured by Resideo for reliability and advanced functionality.
1.2 Importance of Proper Installation
Proper installation of the Honeywell T6 Pro thermostat is crucial for ensuring optimal performance, safety, and energy efficiency. Incorrect wiring or setup can lead to system malfunctions or damage. Always follow the installation manual to verify compatibility with your HVAC system, check power requirements, and ensure correct wiring connections. Improper installation can result in safety risks or inefficient heating/cooling. Adhering to the guidelines ensures reliable operation, prevents costly repairs, and guarantees the thermostat functions as intended for years to come.
1.3 Where to Find the Honeywell T6 Pro Installation Manual PDF
The Honeywell T6 Pro Installation Manual PDF can be accessed from the official Honeywell Home website or authorized support pages. Visit the product section, navigate to the thermostat category, and locate the T6 Pro model. The manual is available for download in PDF format, ensuring easy access to installation instructions, wiring diagrams, and troubleshooting tips. Compatibility and system requirements are detailed within the document to assist with a successful setup. Manufactured by Resideo Technologies, this guide is essential for proper installation and operation.
Package Contents and Requirements
The Honeywell T6 Pro installation package includes the thermostat, UWP mounting system, decorative cover plate, screws, anchors, and 2 AA batteries for backup power. These components ensure proper installation and operation of the device.
2.1 Items Included in the Package
The Honeywell T6 Pro package includes the thermostat, UWP mounting system, decorative cover plate, screws, and anchors for secure installation. It also contains 2 AA batteries for backup power and a J-box adapter for mounting to an electrical junction box. These components ensure a complete and straightforward installation process, covering all necessary hardware for proper setup. The decorative cover plate helps conceal paint gaps, while the UWP system allows for easy wall mounting without a junction box.
2.2 Additional Tools and Materials Needed
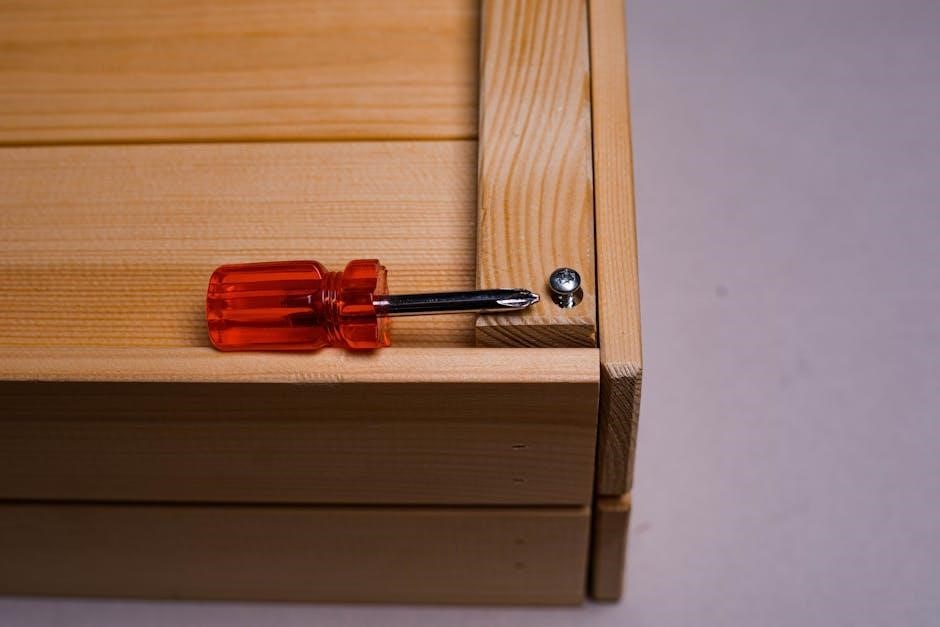
Beyond the included items, you may need a screwdriver, drill, and wall anchors for mounting. A level ensures proper alignment, and wire strippers are useful for wiring connections. A voltage tester can verify power setup, and a ladder may be necessary for high walls. Ensure all tools comply with safety standards to avoid damage or injury. These additional materials facilitate a secure and accurate installation, aligning with the manual’s guidelines for a reliable setup.
Installation Requirements and Precautions
This section outlines essential requirements and precautions for installing the Honeywell T6 Pro, including compatibility checks, power requirements (24 VAC and C-Wire), and critical safety measures to ensure a safe and effective installation.
3.1 Compatibility Check for HVAC Systems
The Honeywell T6 Pro is compatible with most heating, cooling, and heat pump systems but does not support electric baseboard heat (120-240V) or millivolt systems. Ensure your HVAC system requires 24 VAC power and verify the presence of a C-wire for proper operation. Compatibility checks are crucial to avoid installation issues. Always refer to the manual for specific system requirements and wiring guidelines to ensure seamless integration with your existing HVAC setup.
3.2 Power Requirements (24 VAC and C-Wire)
The Honeywell T6 Pro requires a 24 VAC power supply and a C-wire for consistent operation. Ensure your HVAC system provides 24 VAC and verify the presence of a C-wire in your wiring setup. If a C-wire is not available, certain features may not function properly. Always disconnect power at the breaker before performing any wiring to avoid electrical hazards; Refer to the manual for detailed wiring instructions and ensure compliance with these power requirements for reliable thermostat performance.
3.3 Safety Precautions Before Starting
Before installing the Honeywell T6 Pro, ensure the power to your HVAC system is turned off at the circuit breaker to prevent electrical shocks. Use insulated tools to protect against live wires. Avoid touching internal components to prevent damage. Ensure the thermostat is not exposed to water or moisture. Follow all local electrical codes and manufacturer guidelines. Properly ground the system to prevent damage from voltage spikes. Always refer to the manual for specific safety instructions tailored to your installation scenario.

Mounting Options for the T6 Pro Thermostat
The Honeywell T6 Pro offers versatile mounting options to suit various installation needs. Use the UWP Mounting System for a quick setup or install with an optional cover plate. Mounting to an electrical junction box is also supported for compatibility with existing infrastructure.
4.1 UWP Mounting System Installation
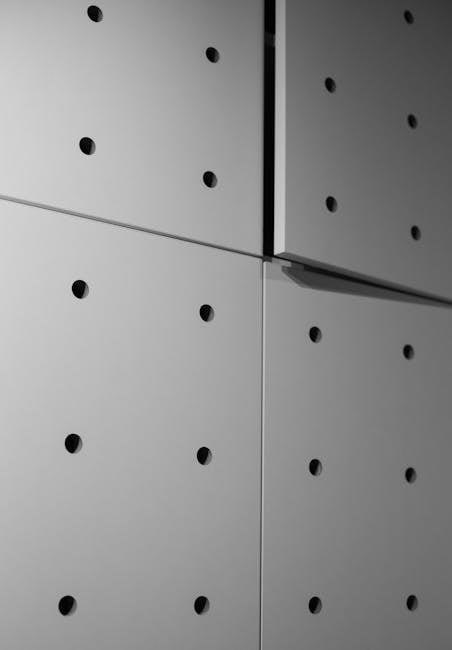
The UWP Mounting System provides a quick and versatile way to install the Honeywell T6 Pro thermostat. Begin by attaching the mounting plate to the wall using the provided screws, ensuring it is level. Align the thermostat with the plate and gently snap it into place. The UWP system allows for easy adjustments and secure fastening without damaging the wall. For added stability, ensure all connections are tight but avoid overtightening. This method is ideal for most installations and supports optional cover plates if needed.
4.2 Optional Cover Plate Installation
The optional cover plate enhances the Honeywell T6 Pro thermostat’s appearance and covers any paint gaps from previous installations. To install, mount the plate on the wall using the provided screws, ensuring it is level. Align the UWP system with the cover plate’s hooks and snap it into place. This accessory is ideal for hiding imperfections and providing a sleek finish. The cover plate is available in various sizes to suit different wall configurations, ensuring a professional-looking installation without extra effort.
4.3 Mounting to an Electrical Junction Box
Mounting the Honeywell T6 Pro thermostat to an electrical junction box ensures a secure and professional installation. Attach the optional cover plate to the junction box using the provided screws, ensuring it is level. Next, hang the UWP system on the cover plate’s top hook and snap the bottom into place. This method provides a sturdy base for the thermostat, ensuring proper alignment and stability. It is recommended for installations where the junction box is already in place, offering a reliable mounting solution.

Wiring Instructions for Different Systems
The Honeywell T6 Pro Installation Manual provides detailed wiring instructions for conventional, heat pump, and hydronic systems. Includes diagrams and terminal connections for accurate setup.
5.1 Wiring Conventional Systems (Forced Air and Hydronics)
The Honeywell T6 Pro Installation Manual provides detailed guidance for wiring conventional HVAC systems, including forced air and hydronic configurations. It outlines connections for 1H/1C systems (1 transformer) and 1H/1C systems with 2 transformers, ensuring proper setup for heating and cooling. The manual specifies terminal connections, such as R, C, and compressor contactor wiring, and includes shaded areas for system-specific configurations. Follow the diagrams and instructions carefully to avoid errors and ensure safe, efficient system operation. Always turn off power before starting any wiring work.
5.2 Wiring Heat Pump Systems
The Honeywell T6 Pro Installation Manual details wiring procedures for heat pump systems, including 1H/1C and 3H/2C configurations. It provides clear instructions for connecting terminals like R, C, and compressor contactors, with shaded areas highlighting model-specific requirements. For 1H/1C heat pumps, the manual ensures proper setup for heating and cooling modes. For 3H/2C systems (TH6320U only), it outlines advanced stage controls. Use the provided diagrams to avoid errors and ensure safe, efficient operation. Always disconnect power before starting any wiring work to prevent damage or hazards.
5.3 Understanding Terminal Connections (R, C, etc.)
The Honeywell T6 Pro manual explains terminal connections, such as R (24VAC power), C (common), and other terminals, to ensure proper system wiring. Correct connections are critical for functionality and safety. Use the manual’s diagrams to identify wires and terminals, and follow instructions for inserting wires into designated slots. Avoid errors by matching your system type (e.g., heat pump, conventional) to the correct terminal configuration. Always disconnect power before wiring to prevent damage or electrical hazards. This section ensures a reliable connection for optimal thermostat performance.
Thermostat Mounting and Power Options
This section covers aligning and securing the thermostat, as well as power options like battery insertion and C-wire connections, ensuring proper setup and functionality.
6.1 Aligning and Securing the Thermostat
To align and secure the Honeywell T6 Pro thermostat, push excess wires into the wall opening and close the UWP door, ensuring it remains closed without bulging. Align the UWP with the thermostat and gently push until it snaps into place. This ensures a secure connection and proper functionality. Once mounted, turn the power on at the breaker box or switch to test the thermostat’s operation. Proper alignment is crucial for reliable performance and to avoid potential issues during use.
6.2 Inserting Batteries for Backup Power
To ensure uninterrupted operation, insert 2 AA batteries into the Honeywell T6 Pro thermostat for backup power. Batteries provide power during outages and are recommended for optimal performance. Insert them when the low battery icon appears. Fresh batteries maintain reliable operation. Follow the manual’s guidelines for proper installation. This step ensures your thermostat remains functional, even during power interruptions, providing consistent climate control and peace of mind for homeowners.
System Operation and Configuration
The Honeywell T6 Pro thermostat operates seamlessly across Heat, Cool, and Fan modes, adapting to your system’s needs. Configure settings like temperature ranges, system modes, and advanced options to optimize performance and comfort. Use the Installer Settings (ISU) to fine-tune parameters such as heat stages and compressor protection. The thermostat learns your system’s behavior to ensure efficient operation and maintain desired temperatures effortlessly.
7.1 Navigating System Modes (Heat, Cool, etc.)
Navigating system modes on the Honeywell T6 Pro thermostat is straightforward. Press the Mode button to cycle through available options, such as Heat, Cool, or Fan. The thermostat displays the active mode, allowing you to switch as needed. Depending on your system configuration, additional modes like Emergency Heat may be available. Use the Mode button to select the desired operation, ensuring your HVAC system responds accordingly. This feature provides flexibility to match your comfort needs with the correct system operation.
7.2 Setting Up the Installer Settings (ISU)
To access the Installer Settings (ISU), press and hold the CENTER and buttons for 3 seconds. This unlocks advanced configuration options. Use the navigation buttons to cycle through settings like Heat Stages, Backup Heat, and Fan Control. Select a setting to adjust its value or enable/disable features. The ISU also includes options like Compressor Protection and Adaptive Intelligent Recovery (AIR). Properly configuring these settings ensures optimal system performance and compatibility with your HVAC equipment. Refer to the manual for detailed instructions on each parameter.

Advanced Setup Options
The Honeywell T6 Pro offers advanced setup options, including configurable heat stages, backup heat, fan control, compressor protection, and Adaptive Intelligent Recovery (AIR) for enhanced HVAC performance and comfort.
8.1 Heat Stages and Backup Heat Configuration
The Honeywell T6 Pro allows configuring heat stages and backup heat settings to optimize HVAC performance. It supports 1 or 2 heat stages and 0 or 1 backup heat stages. The thermostat learns the system’s temperature response to pre-activate heating or cooling, ensuring comfort at scheduled times. Backup heat configuration is essential for dual-fuel systems, while heat stages enhance precision temperature control. These settings are accessed through the Installer Settings (ISU) menu, enabling tailored system operation based on specific requirements.
8.2 Fan Control and Compressor Protection
The Honeywell T6 Pro offers advanced fan control and compressor protection features. Fan control options allow for continuous or auto operation, improving system efficiency. Compressor protection prevents short-cycling by enforcing a minimum off-time after shutdown, extending equipment lifespan. These settings are configurable through the Installer Settings (ISU) menu, ensuring tailored operation for optimal performance and energy savings. Proper configuration is essential to avoid damage and maintain system reliability.
8.3 Adaptive Intelligent Recovery (AIR) Setup
The Adaptive Intelligent Recovery (AIR) feature ensures your system reaches the desired temperature at the scheduled time. By learning your system’s performance, it starts heating or cooling earlier when needed. This comfort-focused setting is configurable through the Installer Settings (ISU) menu. Enabling AIR optimizes temperature accuracy and comfort, making it ideal for maintaining consistent indoor conditions. Proper setup ensures energy efficiency and prevents temperature fluctuations, enhancing overall system performance and user satisfaction.
Performing a System Test
Access the test menu to verify system functionality. Test heat, cool, and fan modes to ensure proper operation. This step confirms the thermostat and HVAC system are working correctly together.
9.1 Accessing the Test Menu
To access the test menu, press and hold the CENTER and buttons simultaneously for approximately 3 seconds; This will open the advanced menu. Use the navigation buttons to scroll to TEST and press Select to enter the system test mode. From here, you can test heat, cool, and fan modes to ensure proper system operation. The test menu allows you to verify thermostat and HVAC system functionality, ensuring everything works correctly before finalizing the installation. Refer to the manual for detailed testing procedures.
9.2 Testing Heat, Cool, and Fan Modes
Once in the test menu, use the navigation buttons to cycle through available modes: Heat, Cool, Fan, and Emergency Heat (if applicable). Select a mode to activate the corresponding system function. The thermostat will display the active mode and status. Test each mode to ensure proper operation, such as heating or cooling activation and fan blower operation. This step confirms that the thermostat and HVAC system are communicating and functioning correctly. Repeat the process for all modes to verify system-wide functionality before finalizing the installation.
Technical Specifications
The Honeywell T6 Pro operates within a temperature range of 40°F to 90°F for heating and 50°F to 99°F for cooling. It requires 24 VAC power and supports most HVAC systems, excluding electric baseboard heat. The thermostat is manufactured by Resideo Technologies under license from Honeywell International, ensuring reliability and compatibility with smart home systems.
10.1 Temperature Range and Operating Conditions
The Honeywell T6 Pro thermostat operates effectively within a temperature range of 40°F to 90°F for heating and 50°F to 99°F for cooling. It functions optimally in ambient temperatures between 32°F and 120°F, ensuring reliable performance in various environments. The thermostat is designed to operate in conditions as low as -20°F during shipping and up to 102°F during normal use. These specifications ensure compatibility with most HVAC systems, providing consistent comfort and energy efficiency in residential settings.
10.2 Compatibility with Smart Home Systems
The Honeywell T6 Pro thermostat is designed to integrate seamlessly with popular smart home systems, enhancing convenience and control. It is compatible with Android and iOS smartphones, allowing users to manage settings remotely through dedicated apps. Additionally, the thermostat supports voice control via platforms like Amazon Alexa, enabling hands-free adjustments. This compatibility ensures effortless integration into modern smart home ecosystems, providing a streamlined experience for users seeking advanced home automation and energy management solutions.
Troubleshooting Common Issues
Troubleshooting the Honeywell T6 Pro involves checking circuit breakers, ensuring power switches are on, and verifying system compatibility. Address issues like blank displays or temperature mismatches promptly.
11.1 Blank Display or Power Issues
A blank display or power issues on the Honeywell T6 Pro may indicate a tripped circuit breaker or an off power switch. Check the breaker box and ensure the HVAC system’s power switch is on. Low battery levels can also cause the display to go blank. Replace the batteries with fresh ones when the low battery icon appears. Ensure the R and C wires are correctly connected in their terminals. If issues persist, verify the system’s compatibility and wiring connections as outlined in the manual.
11.2 System Not Reaching Set Temperature
If the system fails to reach the set temperature, check the thermostat settings and ensure they are correctly configured. Verify that the temperature sensor is functioning properly and free from obstructions. Ensure all wiring connections are secure and match the system requirements outlined in the manual. Check for any software updates for the thermostat and perform a system test to identify issues. Consult the troubleshooting section in the manual for additional guidance on resolving temperature control problems effectively.
11.3 Compressor Protection and Delay Features
The Honeywell T6 Pro thermostat includes compressor protection to prevent short cycling, ensuring the system operates efficiently. This feature forces the compressor to wait a few minutes after shutdown before restarting. Access the Installer Settings (ISU) to configure compressor delay times, ranging from 1 to 5 minutes. Proper setup of this feature helps extend equipment lifespan and maintain optimal system performance. Refer to the manual for detailed instructions on adjusting these settings to suit your HVAC system requirements.
The Honeywell T6 Pro installation is complete; Conduct final checks to ensure all connections are secure and settings are properly configured. Verify system operation to confirm heating, cooling, and fan modes function correctly. Refer to the manual for any adjustments and ensure optimal performance.
12.1 Ensuring Proper Installation
Double-check all connections and settings to confirm compliance with the Honeywell T6 Pro Installation Manual PDF. Verify wiring accuracy, power requirements, and system compatibility. Ensure the thermostat is securely mounted and aligned properly. Test all modes (Heat, Cool, Fan) to confirm functionality. Review the manual for any specific adjustments or recommendations. Proper installation ensures optimal performance, energy efficiency, and system reliability. Address any issues promptly to avoid operational discrepancies.
12.2 Verifying Thermostat Operation
After installation, power on the thermostat and ensure the display is active. Test all system modes (Heat, Cool, Fan) to confirm proper operation. Navigate through settings to verify temperature adjustments and scheduling functionality. Check for smooth transitions between heating and cooling modes. Ensure the thermostat responds correctly to temperature changes and setpoints. Review the manual for specific test procedures to validate system performance. Proper operation ensures comfort, energy efficiency, and reliable heating and cooling system control.
Additional Resources
Access the Honeywell T6 Pro installation manual PDF on Honeywell’s official website or support page. Explore online support, FAQs, and contact customer service for further assistance.
13.1 Online Support and FAQ
Visit Honeywell’s official website for comprehensive online support and FAQs related to the T6 Pro installation manual. The resource section offers detailed troubleshooting guides, installation tips, and answers to common questions. Users can access downloadable PDF manuals, wiring diagrams, and video tutorials to assist with setup. The FAQ section addresses topics like system compatibility, power requirements, and advanced features, ensuring quick resolution to installation or operational issues.
13.2 Contacting Honeywell Customer Service
For assistance with the Honeywell T6 Pro installation manual, contact Honeywell Customer Service through their official website, phone, or email. Support is available Monday to Friday, 8 AM to 5 PM CST. The manual includes contact information on the last page. Representatives can help with troubleshooting, installation, or technical queries, ensuring a hassle-free experience. Reach out for professional guidance to resolve any issues promptly and efficiently.

About Honeywell Home
Honeywell Home, a trusted name in home comfort, offers innovative solutions like the T6 Pro. Licensed from Honeywell International, products are manufactured by Resideo Technologies.
14.1 Honeywell Home Trademark and Licensing
The Honeywell Home trademark is used under license from Honeywell International, Inc., reflecting a legacy of trust and innovation. Manufactured by Resideo Technologies, Inc., Honeywell Home products, including the T6 Pro, emphasize quality and reliability. This collaboration ensures cutting-edge solutions for home comfort, with a focus on energy efficiency and smart technology. The licensing agreement underscores the brand’s commitment to delivering exceptional products, supported by robust customer service and a reputation for excellence in the industry.
14.2 Resideo Technologies and Manufacturing
Resideo Technologies, Inc. is the manufacturer behind the Honeywell Home T6 Pro thermostat, ensuring high-quality production and innovative solutions. With a focus on smart home technology and energy efficiency, Resideo upholds the Honeywell legacy of reliability and performance. Their manufacturing processes prioritize precision and durability, meeting the growing demands of modern home comfort systems. This commitment to excellence ensures that the T6 Pro and other Honeywell Home products deliver exceptional results, tailored to meet the evolving needs of homeowners worldwide.