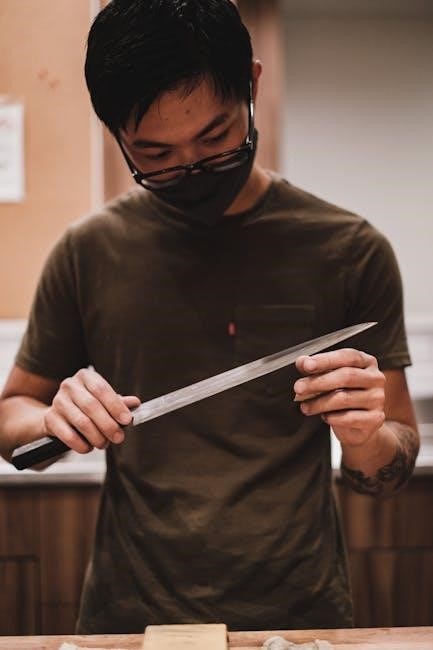
Discover the art of knife sharpening with an angle guide, ensuring precise angles for optimal performance. Learn how this essential tool enhances sharpening consistency and effectiveness for any blade type.

The Importance of Sharpening Angle
The sharpening angle significantly impacts a knife’s performance, durability, and safety. A precise angle ensures optimal cutting efficiency, prevents damage, and maintains consistency, making it a critical factor in effective sharpening.
Performance and Effectiveness
A proper sharpening angle directly enhances a knife’s performance and effectiveness. A well-chosen angle ensures the blade cuts efficiently, requiring less force and reducing fatigue. For instance, Japanese knives, typically sharpened at 15-17 degrees, achieve exceptional sharpness for precise cuts, while thicker blades like chef knives benefit from slightly higher angles, such as 20 degrees, for durability and versatility. Using an angle guide helps maintain consistency, preventing the edge from becoming too fragile or overly blunt. This precision ensures the knife glides through materials smoothly, making tasks easier and safer. Whether for culinary use or outdoor activities, the right angle maximizes the knife’s potential, transforming it into a reliable and high-performing tool. By mastering the sharpening angle, users can unlock their knife’s full capabilities, ensuring superior results in every cut.
Durability of the Blade
The sharpening angle significantly impacts the durability of a knife’s blade. A thinner edge, sharpened at a narrower angle, offers exceptional sharpness but may be more prone to chipping or rolling with heavy use. Conversely, a thicker edge, sharpened at a wider angle, sacrifices some sharpness for increased robustness and longevity. For example, high-carbon steel blades and Japanese knives often benefit from angles between 15-17 degrees, balancing sharpness and durability. However, for tougher tasks, a 20-degree angle is recommended to prevent wear and tear. Maintaining the correct angle ensures the blade withstands regular use without compromising its cutting efficiency. Proper angle selection, tailored to the knife’s steel type and intended use, is crucial for extending its lifespan and maintaining performance over time.
Safety Considerations
Maintaining the correct sharpening angle is crucial for safety, as improper technique can lead to accidents. Using an angle guide ensures the knife remains stable during sharpening, reducing the risk of slippage. A consistent angle also prevents the blade from becoming too fragile or uneven, which can cause unpredictable behavior during use. Sharpening at the wrong angle may result in a dull or wobbly edge, increasing the likelihood of injuries. Additionally, a well-sharpened knife with a proper angle is less likely to slip and cause unintended cuts. By adhering to the recommended angles for your knife type, you minimize risks and ensure a safer sharpening process. Always prioritize steady hands and proper tool setup to maintain control and achieve a safe, effective sharpening experience.
Consistency in Sharpening
Consistency is key to achieving a razor-sharp edge, and an angle guide ensures uniformity throughout the sharpening process. By maintaining the same angle with each stroke, you avoid uneven edges and guarantee a precise finish. This consistency is especially important for maintaining the knife’s performance and longevity. An angle guide acts as a reliable visual cue, helping you stay focused and avoid deviations. Over time, this consistency translates to better control and more efficient sharpening sessions. Whether you’re sharpening a chef’s knife or a pocket knife, the angle guide’s steady reference point ensures every edge is sharpened to the same high standard. This level of consistency is difficult to achieve with freehand sharpening, making the angle guide an indispensable tool for both beginners and experienced sharpeners alike.
Determining the Correct Sharpening Angle
Determining the correct sharpening angle involves considering steel hardness, blade thickness, and intended use. Angle guides and charts help select the ideal angle, ensuring optimal sharpness and durability for any knife.
Factors Influencing the Sharpening Angle
Several factors influence the ideal sharpening angle, including steel hardness, blade thickness, and intended use. Harder steels can handle narrower angles for sharper edges, while thicker blades require wider angles for durability. The knife’s purpose also plays a role; for example, Japanese knives often use a 30-degree angle for precision, whereas utility knives may need a wider angle for robustness. Additionally, user preference and sharpening tools can affect the chosen angle. Understanding these factors ensures the blade is sharpened effectively, balancing sharpness and longevity. Angle guides and charts provide a helpful reference to determine the optimal angle for various knife types, making the sharpening process more precise and consistent.
Knife Sharpening Angle Chart
A knife sharpening angle chart serves as a comprehensive guide to determine the optimal angles for various knife types. Common angles range from 15 to 30 degrees, with specific recommendations based on the knife’s purpose. For instance, Japanese knives typically use a 15-17 degree angle for precision cutting, while chef knives often prefer a 20-degree angle for versatility. Utility knives and survival knives may require a wider angle, such as 25-30 degrees, for enhanced durability. The chart also accounts for blade thickness and steel hardness, ensuring the angle chosen balances sharpness and edge retention. By referencing this chart, users can achieve consistent results and extend the life of their blades. Many charts are available as downloadable PDFs, offering a quick and handy reference for sharpening sessions.
Tools and Accessories for Angle Guided Sharpening
Essential tools for angle-guided sharpening include angle guides, sharpening stones, and stabilizing accessories. These ensure precision and consistency, making the sharpening process efficient and effective for any knife type.
Angle Guides and Their Designs
Angle guides are indispensable tools for maintaining precise sharpening angles, ensuring consistency and effectiveness. These guides come in various designs, with some featuring multiple built-in angles (e.g., 14°, 17°, 20°, and 25°) to accommodate different knife types. Simple plastic or metal wedges are popular, as they sit on the sharpening stone, providing a clear visual reference without interfering with the sharpening process. Adjustable angle guides offer flexibility, allowing users to set custom angles based on the knife’s intended use. Some designs include rubber bands for secure placement, while others feature sleek, compact builds for portability. High-quality angle guides often cater to both professionals and DIY enthusiasts, ensuring sharp, durable edges. Their clever designs make them versatile, suitable for kitchen knives, pocket knives, and even specialized blades. By incorporating an angle guide, sharpening becomes more precise, enhancing both the performance and longevity of the blade.

Sharpening Stones and Their Role
Sharpening stones are essential tools in the knife-sharpening process, playing a crucial role in honing and refining the blade’s edge. Available in various types, such as water stones, oil stones, ceramic stones, and diamond stones, each offers unique benefits. Water stones are popular for their fast cutting action, while oil stones provide a finer finish. Ceramic and diamond stones are known for their durability and consistency. The stone’s grit determines its abrasiveness, with coarser grits for initial sharpening and finer grits for polishing. When used with an angle guide, sharpening stones help maintain the correct angle, ensuring even wear and a razor-sharp edge. Regular use of sharpening stones extends the knife’s lifespan and enhances its performance. Proper care, such as cleaning and flattening, is necessary to maintain the stone’s effectiveness. Together with an angle guide, sharpening stones are indispensable for achieving professional-level results.
Other Essential Tools
Beyond angle guides and sharpening stones, several other tools are crucial for effective knife sharpening. A sharpening jig or clamp helps stabilize the knife, ensuring precise control. Strops, made of leather or canvas, are used for final polishing, removing minor imperfections. Honing steels, often mistaken for sharpeners, realign the blade’s edge, maintaining sharpness. Cleaning cloths are essential for wiping away metal particles and residue during the process. Additionally, a consistent workspace with proper lighting is vital for visibility. These tools collectively enhance the sharpening experience, ensuring a sharp, durable edge. While the angle guide and stone are central, these accessories refine the process, making it more efficient and effective. Together, they help achieve professional-level results, whether for culinary, outdoor, or everyday use.
Step-by-Step Guide to Sharpening with an Angle Guide
Master the process with a step-by-step approach, ensuring precise angle control. Attach the guide, set the angle, and sharpen evenly, transforming dull blades into razor-sharp tools with ease and precision.
Preparing the Knife and Tools
Before sharpening, inspect the knife for damage or debris. Clean the blade with a dry cloth to ensure a smooth sharpening process. Secure your sharpening stone on a stable surface and attach the angle guide using rubber bands or clips. Position the guide at the desired angle, such as 20 degrees for general-purpose knives. Ensure the knife is aligned properly with the guide, maintaining consistent contact throughout. For best results, use a high-quality whetstone or sharpening steel. If using a water stone, soak it according to the manufacturer’s instructions. Keep a container of water or sharpening oil nearby for lubrication. Finally, place the knife at the correct angle, resting it lightly against the guide. This setup ensures precision and safety, making the sharpening process efficient and effective. Proper preparation is key to achieving a razor-sharp edge every time.
Setting Up the Angle Guide
To set up the angle guide, begin by attaching it to your sharpening stone using rubber bands or clips. Ensure the guide is securely positioned and aligned with the edge of the stone. Most angle guides offer multiple preset angles, such as 14°, 17°, 20°, or 25°, allowing you to choose the ideal angle for your knife type. For general-purpose knives, a 20° angle is often recommended. Once the guide is in place, test the angle by gently placing the knife against it to confirm proper alignment. Adjust the guide as needed to ensure accuracy. The angle guide should remain stationary during sharpening, serving as a visual reference to maintain consistency. Proper setup ensures that you can achieve the desired edge angle efficiently, making the sharpening process both precise and effective. This step is crucial for achieving a sharp, durable blade every time.
The Sharpening Process
With the angle guide set, begin by holding the knife at the desired angle, using the guide as a reference. Start with a coarse-grit stone to establish the edge, then progress to finer grits for polishing. Lightly draw the knife across the stone in smooth, consistent strokes, maintaining the set angle throughout. Alternate sides with each stroke to ensure even sharpening. Apply gentle pressure, increasing slightly as the edge becomes sharper. Periodically inspect the edge to check progress. Once the knife shows a consistent, sharp edge, finish with a final stroke on the finest grit. For optimal results, maintain steady, controlled movements and avoid applying too much pressure, which can damage the blade. The angle guide ensures precision, helping you achieve a razor-sharp edge with minimal effort. This method works for all knife types, from chef knives to pocket knives, ensuring a professional finish every time.
Finishing Touches
Once the sharpening process is complete, inspect the knife’s edge under bright light to ensure it is sharp and even. Use a leather strop or soft cloth to hone the blade, removing any micro-scratches. Wipe the knife clean to remove metal particles and debris. For the final touch, apply a light oil to the blade to prevent rust and maintain sharpness. Store the knife in a dry place or on a magnetic strip to avoid dulling. Regular maintenance with a honing steel can preserve the edge between sharpening sessions. Proper finishing ensures the knife remains sharp, durable, and ready for use. This step is crucial for both performance and longevity, making the sharpening process worthwhile. By following these steps, you achieve a professional-grade finish that enhances the knife’s functionality and extends its lifespan.

Maintaining the Sharpening Angle
Maintaining the sharpening angle is crucial for consistent results. Use an angle guide to ensure accuracy during each stroke. After sharpening, check the angle with a marker or gauge to verify consistency. Regularly hone the knife with a steel to preserve the edge without altering the angle. For long-term maintenance, periodically re-sharpen the knife at the same angle to prevent edge degradation. Store the knife properly to avoid accidental dulling; By adhering to these practices, you can maintain the desired sharpening angle, ensuring the knife remains sharp and functional over time. Proper maintenance not only extends the blade’s lifespan but also enhances its performance in various tasks. Consistency is key to achieving and preserving a razor-sharp edge with the correct angle.
Common Mistakes to Avoid
When sharpening with an angle guide, avoid inconsistent strokes, as they can lead to an uneven edge. Applying too much pressure may damage the blade or misalign the angle. Forgetting to check the edge angle periodically can result in a poorly sharpened knife. Another mistake is using the wrong sharpening stone grit for the task, which can hinder progress. Neglecting to maintain the angle guide itself, such as cleaning or aligning it properly, can also affect results. Additionally, sharpening without a consistent rhythm or focus may lead to a dull or wavy edge. Lastly, ignoring the knife’s steel type and thickness when selecting an angle can compromise sharpness and durability. By being mindful of these common errors, you can achieve a precise, razor-sharp edge every time. Proper technique and attention to detail are key to successful sharpening with an angle guide.
Knife Sharpening Angle Chart
A knife sharpening angle chart is an essential reference for achieving the perfect edge. It provides guidelines for various knife types, ensuring optimal sharpness and durability. For instance, chef knives typically use a 20-degree angle per side, resulting in a 40-degree total edge. Pocket knives and utility knives often range between 25-30 degrees, while Japanese knives may require a sharper 15-17 degrees per side. The chart also considers blade thickness and steel hardness, as thicker blades or harder steels may need slightly wider angles for durability. Additionally, it highlights that the sharpening angle is half the total edge angle, as both sides of the blade are sharpened. By consulting a knife sharpening angle chart, users can match their knife type to the ideal angle, enhancing performance and longevity. This chart is a valuable tool for both beginners and experienced sharpeners, ensuring precise and effective results.
Advanced Techniques for Precision Sharpening
Mastering advanced techniques for precision sharpening involves refining your skills with an angle guide. One method is using a built-in angle gauge, like the Angle Pro Knife Sharpener, which ensures consistency and accuracy. Another technique is micro-adjusting the angle based on blade type, such as using 15-17 degrees for high-carbon steel or Japanese knives. Experienced sharpeners also employ the “marker technique,” where a marker line is drawn on the blade to track progress and maintain even sharpening. Additionally, alternating between light, controlled strokes and heavier pressure can enhance edge sharpness. For ultimate precision, consider using a sharpening jig or stand-up tool, which keeps the stone stable and angle consistent. These advanced methods, combined with practice, elevate sharpening to a professional level, ensuring razor-sharp results every time. By refining these techniques, you can achieve unparalleled precision in your knife sharpening process.
Knife sharpening with an angle guide is a game-changer for achieving precision and consistency. By maintaining the correct angle, you ensure optimal performance, durability, and safety. Whether you’re a professional chef or an outdoor enthusiast, an angle guide simplifies the sharpening process, making it accessible to all skill levels. With practice, you’ll master the technique, resulting in razor-sharp blades that enhance your cutting experience. For those seeking to refine their sharpening skills, incorporating an angle guide is a must. It guarantees a consistent edge, reducing the risk of uneven sharpening. Over time, this tool becomes indispensable, helping you maintain your knives in peak condition. Embrace the precision of angle-guided sharpening and enjoy the satisfaction of a perfectly sharpened blade every time.